| Technical Support for AiM Solo/Solo DL |
||
| FAQ | ||
| Q: What is the difference between AiM Solo and AiM Solo DL? A: AiM Solo DL is an upgraded version of AiM Solo that can integrate with ECUs to download additional racing data. Q: Can AiM Solo be upgraded to AiM Solo DL? A: No. They are completely separate units. Q: In terms of hardware, what is the difference between AiM Solo DL CAN and AiM Solo DL OBDII? A: The main unit is the same, only the harness is different. Q: Can AiM Solo DL connect to a camera such as GoPro? A: No. AiM Solo DL only supports integration with SmartyCam HD. |
Q: Which racing mode should be used? A: For circuit tracks (i.e. oval and road course) and autocross (point-to-point), select Speed. For drag race, select Performance. Q: If my track is not in the GPS Manager database, what should I do? A: Check with the race track's safety personnel to make sure that you can safely access the start/finish line. Next, bring your Solo/Solo DL to the desired start/finish line. Then, allow the unit to discover GPS signal. Scroll through the main display screen to "OK: Start GPS Marker." Finally, press OK. Don't see what you need? Call or email us! |
|
| How To | ||
Enable Display of Multiple Fields (lap time, RPM, brake pressure, etc) on the Same Screen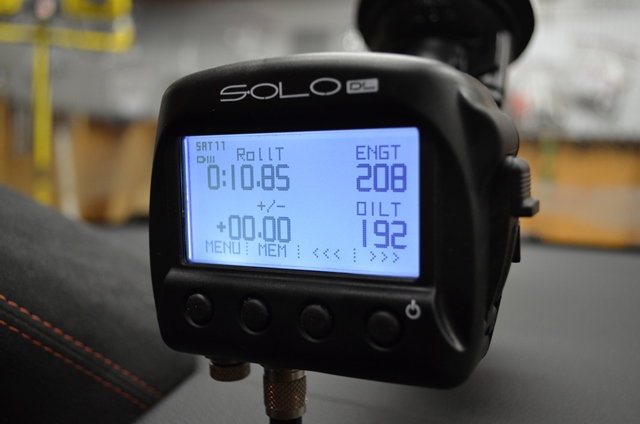 Getting There Menu> Display Setup> Page Setup> Custom Page Setup> Configure> Options Page - You can configure up to 4 custom screens Data Field - Choose 1-4 fields of data on the same screen Configure - Enter to configure your custom screen Display Lap Time for a Longer (or Shorter) Period of Time after Passing the Start/Finish Line Getting There Menu> Race Mode Setup> Options Lap time Vis: Choose 3-30 seconds Enable Display of Rolling Lap Times (like a stopwatch) Getting There Menu> Display Setup> Page Setup> Enable/Disable Pages> Options Page - Choose Lap Time Enabled - Yes Lap Time - Change from Static to Rolling |
Enable Predictive Lap Timing: Display Time Delta +/- from Previous Best Lap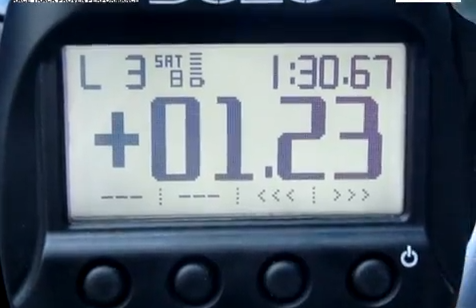 Getting There Menu> Display Setup> Page Setup> Enable/Disable Pages> Options Page - Choose Predictive Enabled - Yes Lap Time - Change to +/- Best Calibrating your Solo DL for Gear Position Display Getting There Menu> System Management> Restart Gear Calib> Let System Clear, Exit All Menus> Calibration Start driving while going through all gears across a reasonably wide rpm range -- smoothly without any hard launches or wheel spins. Note: after calibration, gear position cannot be displayed at low RPM, i.e. < 1,500. Check your gear calibration by setting up a custom screen displaying gear position. Using Solo for Autocross, Hill Climb (non-circuit courses) Getting There Menu> Race Mode Setup> Options Race Mode - Choose Speed Track - Choose Point to Point |
|
| Technical Support for AiM SmartyCam HD/GP HD |
||
| FAQ | ||
| Q: What is the difference between SCHD and SCGPHD? A: SCGPHD offers a bullet cam and a larger screen. First gen SCHD did not offer an external audio option. Otherwise the capabilities are the same. Q: How should I choose between SCHD and SCGPHD? A: For closed-roof and GT cars, SCHD is recommended because its lens is designed for being mounted on the roll cage just behind the driver. For formula cars, karts and motorcycles, SCGPHD is recommend because the lens has a wider angle of view and is smaller in size for easier mounting. |
Q: How many cameras can be connected to a SCGPHD? Q: How long does the battery last? |
|
| How To | ||
| Update SmartyCam HD Firmware Step 1: On PC Turn off SmartyCam, remove the SD card and insert into PC. Unzip the latest firmware onto SD card. Insert SD card back into SmartyCam. Step 2: On SmartyCam Turn on SmartyCam by pressing both the center and right buttons. Release the center button when the screen lights up. Release the right button when the Linux Penguin shows up. Allow update to run. |
||